
Kingfish at 3 King Islands part 2
4:56PM 12th Sep 13
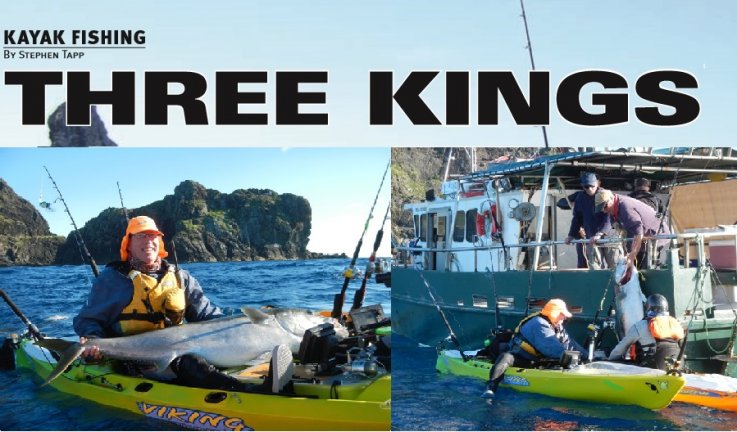
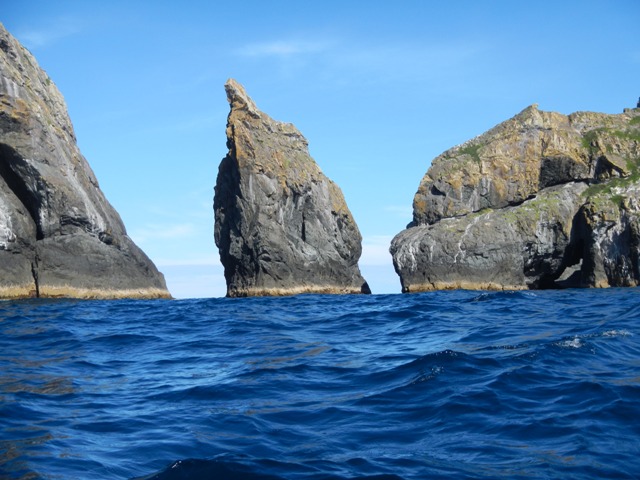
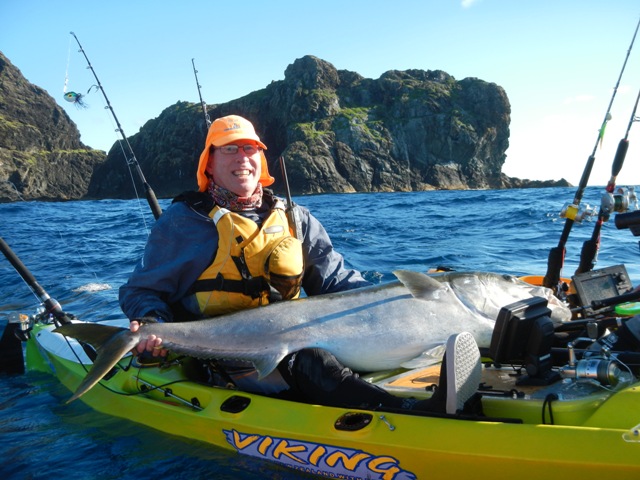
The paddling easily exceeded my expectations. Cliffs cascading into the blue ocean, huge arches to paddle through, and sometimes sweeping currents to keep you from getting too distracted by your surroundings! It goes without saying that the fish can be huge and were the real reason we were there…
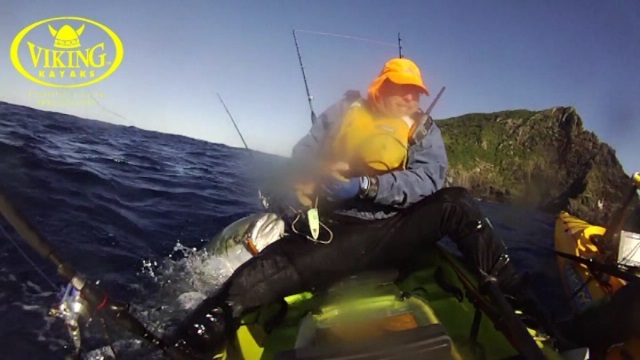
As mentioned in Part 1, our primary focus was on kingfish, and the potential to hook and play multiple hoodlums was the ideal opportunity to try a variety of techniques. It was therefore time for me to put mechanical jigging from kayaks under the spotlight. So I chose to leave my live-bait and monster soft-plastic rigs in the tackle bag and catch all my kings on jigs. In fact, the only natural baits I used were on a couple of unsuccessful drops for ‘puka, and the softies were only called to action on other species while taking a break from the jigs.
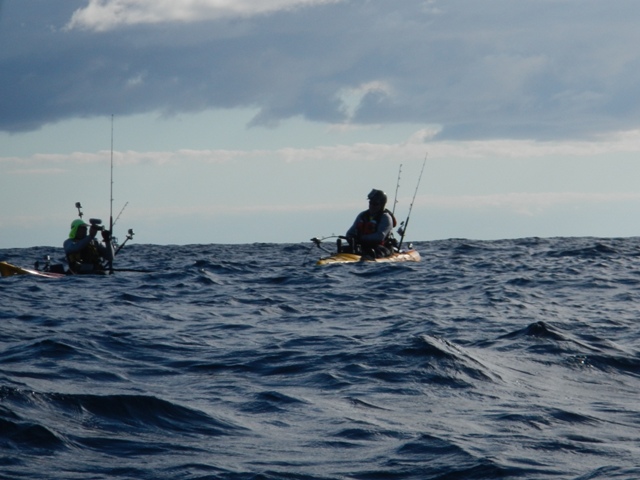
One of the great advantages of multi- day mother-ship trips is being able to call on the expertise and experiences of other anglers. This excursion was no exception, with skippers Tank and Lionel both willing libraries of information, while the experience of anglers Rob and Neil contributed volumes to the discussions on tackle, techniques and tactics. I’ve found it doesn’t matter how much knowledge you think you have, there’s always someone who can add something new!
After spending this trip focusing on a single technique to target kingfish, successfully boating several, and building on many years of speed jigging and ‘playing’ with mechanical jigging from kayaks, I’ve come up with a few observations. The following is what proved successful for me, and though some of it flies in the face of popular opinion, I’ve managed to land more than enough fish to prove it works.
Spinning versus free-spool reels
With most good quality reels having smooth drags (the single-most critical feature for successfully fishing heavy line classes from kayaks), there’s now a real dilemma in choosing between fixed and free-spool reels for jigging. Fixed-spool reels can be easier to use when playing big fish for a couple of reasons: there’s no need to manually lay the line evenly across the spool (this is done automatically as the spool oscillates), and since the reel hangs below the rod, there’s less need for a gimbal to hold the reel in position and prevent it rocking from side to side as you crank line in under heavy load.
The downside with having the reel hanging below the rod is that this puts it at greater risk of bashing into the sides of the cockpit, especially as big kings attempt to wrench everything from your hands and over the side. Also, care must be taken when actually jigging, so the spinning bail doesn’t collide with anything in the close confines of the cockpit. Consequently, a higher rod angle is often adopted (especially by shorter anglers), which can be less comfortable when working the rod through the repetitive mechanical-jig strokes.
Free-spool jigging reels with narrow frames are arguably the easiest to mechanically jig with from a kayak. The narrow design reduces the need to manually level the line across the spool with your thumb, and with practice I’ve found this can be achieved by gently rolling the rod a few degrees off-line to one side or the other during the retrieve. The subtle changes in line angle coming from the stripper guide (the guide nearest the reel) will run the braid across the spool for you.
The real advantage with free-spool reels is having the reel above the rod. This allows a much greater range of movement without hitting the side of the kayak or high-sticking the rod. I also find it much easier to sit up and get my shoulders over the reel (with the rod butt tucked in my left armpit) for greater leverage with the mechanical- jigging action. (Remember, we’re sitting in a kayak, not standing in a boat, so the mechanics are subtly different.)
Whichever system you choose to use, make sure the rod, reel and line are suited to each other and designed to handle the jig weights you intend to use. Having a balanced system makes a big difference to the action you’re able to generate with the jig, and once hooked up, will greatly influence your ability to fight and land the fish. Then, it’s simply a case of practice – the more you do, the better you’ll get.
Long butt, short butt?
This is an interesting question that crops up regularly, especially as mechanical-jigging rods typically have long butts. There’s a variety of opinion amongst kayak anglers, so here’s my take on the answer. For free-spool mechanical jig setups, I prefer to leave the rod butt long. This makes it much easier to control the jigging action with the end of the butt tucked in your armpit; it’s a technique that enables a considerably greater range of motion and makes instinctively keeping the line level on the spool much easier.
For fixed-spool outfits I’ve chosen to shorten my rod butt slightly. Admittedly, with the reel hanging below the rod the range of motion is more limited (to avoid hitting the coamings), restricting me to higher rod angles, but this does help stop the shorter butt from slipping out of my armpit. The main payoff with the shortened butt is the greater leverage gained during the actual battle, thanks to the butt tucked in your belt, so the reel is positioned closer to your body, enabling line to be muscled onto the spool more easily.
Sorting the rigging
Before I start, let me clarify that I’m not going to cover the ‘how to’ for tying the various knots mentioned. There are a wide range of resources available to assist with knot recipes and techniques, and several will also require tools and detailed instructions. Since the majority are quite complex to tie, it’s often better to visit your local tackle shop and have them demonstrate the knots for you.
The systems I use for adding a leader to the end of my braid main- line are split into two categories: those I use when setting up before hitting the water (back on land or aboard the mother ship) and those I’m happy to tie when sat in the confines of a cockpit during the hurly- burly of fast kingfish action. It’s a case of the difference between using the best possible joins tied under ideal conditions and settling for less effective, but easier to tie connections when out in the ‘field’.
In my opinion, there are a couple of factors to keep in mind when working with jigging braids and leaders on kayaks. The most significant is a serious limit to the amount of force we can put on the system (i.e. even though we’re often fishing with gear rated to 37kg, we’re barely able to apply 12-15kg of actual pressure in most conditions). Secondly, we aren’t tracing fish in the same manner anglers do from larger boats.
Consequently, even though you should use the best possible joining systems, circumstances sometimes dictate the use of technically simpler knots while in the confines of a kayak cockpit. This allows us to confidently fish with knots and joins that may have only 60-80% rated strength.
Having now fished with both the PR and GT (or FG) knots tied in ideal conditions, I’ve found them equally good in kayaking terms. When tying them in less than ideal conditions (a moving kayak cockpit), I find the PR works well, but struggle to get the GT built and tightened correctly. As a result my GT knot isn’t as reliable as an improved Albright-style knot, so I’ve stopped using it, while I know an improved Albright will do the job.
My experimentations with knots mean I now:
- Start all trips with PR knots for maximum performance (though properly tied and tightened GT knots are also good);
- On board the kayak I replace lost leaders with a PR knot if conditions aren’t too rough to swing the bobbin in the kayak cockpit;
- In rough conditions I replace lost leaders with a modified Albright. I’ve fished this knot from kayaks for several years and have yet to ‘pop’ one on a fish, despite the technically-reduced strength compared to more advanced knots.
- Terminal rigging is with a grommet- and-ring or chain knot.
Keep your hooks SHARP!
How many times do we hear this? With jigging it’s no less important, especially when operating from a kayak, where rough conditions can make it difficult to strike hard enough to set the hook on the first hit. This becomes even more important on other species that may not hit as hard as kingfish, or when depths and currents increase the chances of a belly being in the line. Remember, we’re sitting under our rod, not standing on deck behind it with a greater range of movement. I therefore no longer try and sharpen assist-rig hooks. Instead, I simply replace the whole rig at the first sign of corrosion or a blunted point. There’s nothing worse than dropping a monster hoodlum and wondering if a sharper hook might have kept you attached!
Heres is the footage from Stuarts cockpit to take you through his epic 35kg Kingfish battle!
Topics
Latest Posts
Archive Posts
Find Us Also On ...


