
Understanding your fishfinder, Q & A with Stephen Tapp
6:03PM 17th Apr 14
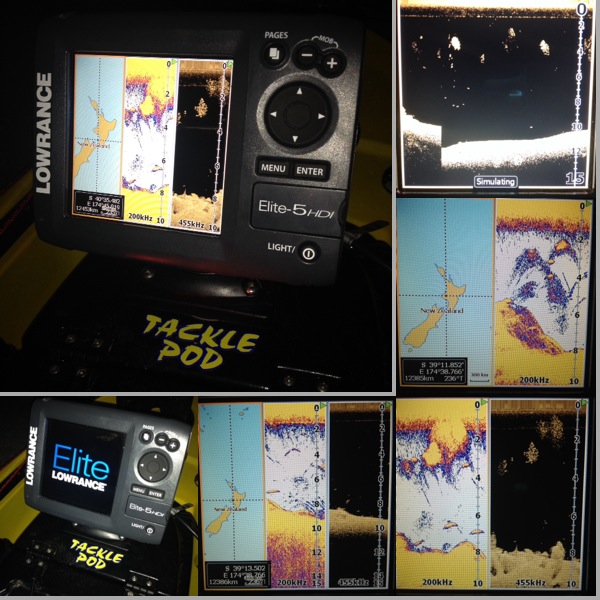
This Q & A session on understanding your FishFinder, with Stephen Tapp is in response to the questions we recieved from this question posted on our FaceBook page "Do you have questions about how to use your sounder more effectively or just want to know some basic rules of thumb? Leave a question here and we will add it to a blog post next week." Stephen answers these questions in breif reply below, stay tuned to the blog to see further explanation on many of these questions over the coming weeks...and if you have a further questions send it direct to jasonm@vikingkayaks.co.nz

Q - How to determine the bottom substrate - i.e. mud, rocks, and seaweed? And also the effect of the transducer on the image? Matt Carter
A - Hi Matt, this is a question with a large number of answers that will depend on the sounder frequencies being used and the settings the instrument is adjusted to.
For the moment let’s ignore low frequencies and those very high frequencies used for down-imaging, and concentrate on 200kHz as the frequency most anglers are looking at. Generally speaking soft muddy or sandy bottoms will show as a thinner bottom line. Harder material will show up as a thickening of the bottom layer on the sounder, with a hard rocky bottom showing as the thickest. The return signals from a hard bottom are also much stronger, so on common sounder settings the colours will be darker in grey scale or redder on colour displays.
Regarding transducers (and again ignoring lower frequencies and down-imaging for the moment), I find narrow beam (e.g. 12°) models tend to give a thinner rendering of the bottom with more detail. This usually makes it easier to interpret the differences between base substrates and any kelp and/or fish present. I find wider beams at 200kHz give a less precise image of the bottom, and it can help to have local knowledge or experience to properly interpret the information being displayed.
Q - What is a good colour setting for lots of glare? I have an elite 4 gps and use the blue fish display when I get there but when the sun is up high I cant see the screen very well.. any suggestions. Jarrad Rodgers
A - Hi Jarrad, I use the white background setting in direct sunlight. This brightens the display in glary conditions and helps ensure I can see all the fine detail the sounder is providing me. I find it also gives the strongest contrast when the display is covered with salt. I use the blue background with the back lighting dimmed in lower light conditions.
Q - When you are looking at fish sign, do the colours actually mean anything? Marc Graham
A - Hi Marc, The different colours are simply helping to tell you how dense and strong the return signal is. The common colour schemes have paler yellow colours for weaker signals and darker redder colours for stronger signals. Using this and the shape of the signals or schools of fish it’s possible to make a guess at the most likely specie. This can be a trap though: I often hear anglers say that snapper always show as red, but I’ve proven this isn’t always the case and often pull large specimens from pale yellow signals near the bottom. Typically though, redder colours on fish arches mean bigger fish, and redder schools are more densely packed or may be made up of larger fish.
Q - How do I reduce the delay on what the screen shows? meaning how to see whats below in real time with your paddling speed..mine appears to be delayed, probably just a simple setting but would be great to know, thanks. Jason Milne
A - Hi Jason, The easiest way is to increase the “Ping Speed” setting to maximum. You may also need to up the “Scroll Speed” on some units. The sounder then sends out the max number of pulses and the right hand edge of your screen will constantly show you what’s below your kayak.
Q - Is there any set way that sounders display the bottom structure, ie does sand appear the same regardless of sounder brand? Mark Abbott
A - Hi Mark,
The general principals are the same for all sounders, and most are fairly similar in the way they display information. At 200kHz most will show sand as a thinner slightly paler bottom, and hard rocky structure as thicker and darker. That said, there are lots of adjustable settings that will change the way bottom and structure are displayed (there are also features like “white-line”, “Colourline”, etc.). When using a different sounder it may be necessary to change colour and bottom display settings, then adjust gain and sensitivity for a more familiar appearance.
Q - How about how to differentiate Kingfish (or Kahawai) sign from snapper sign? E.g. do they look substantially different from one another on the sounder, or is it more of a matter of looking at what depth the sign is and judging from that). Cheers Jarred Kirk
A - Hi Jarred, Fish will often look different on the sounder screen depending on their size and habits in the water. Snapper cruising slowly around structure will usually give a strong signal with reasonably fat arches as you pass over them. If they’re actively hammering a mid-water bait ball they will often present as a thinner streaks (slightly weaker signals) as they empty their swim bladders to make rapid depth changes. When snapper are hard on the bottom and not moving much at all they can sometimes show a speckling of spots, but drop a bait amongst them and they suddenly turn into arches as they move up to check it out. Kingfish often present as dispersed streaks through broad depth ranges, at times all the way from the bottom to the surface, while kahawai will usually be far more tightly packed.
Q - Would like to know the GPS numbers Stephen has saved in his finder and how to load those numbers into mine please. Bam Blaikie
A - Hi Bam,
Loading GPS marks is reasonably straight forward using the “New Waypoint” menu on your chart page. Here’s one that delivered a tuna last time I was there 26°36'52.5"S 153°07'02.7"E ;-)
Q - When to use 50 - 83 or 200kHz frequencies? Shane Kelly
A - Hi Shane, This is a brilliantly simple question that could take screeds of writing to fully answer, so here’s the condensed version:
50kHz at 35° beam angle – excellent depth penetration for shallow and deep salt water fishing, use for targeting snapper and other species in the shallows and for finding structure out wide in depths well beyond 100m
83kHz at 60° beam angle – use for fresh water and for very shallow salt water when looking for new structure
200kHz at 20° beam angle – the single most useful frequency for finding and targeting both fresh and salt water fish. Easily the best frequency and beam angle for depths out to 100m
200kHz at 12° beam angle – this is the “spotlight” providing images detailed enough to hunt individual fish amongst the schools. Also, having all the power concentrated into a narrow beam gives excellent depth penetration for the deep water angler.
For a little more detail, you can see there are two factors paired together when considering sounder frequencies and transducer choices: the actual frequency and the beam angle (how wide the beam is).
Generally speaking, lower frequencies like 50kHz are better at penetrating to depth, especially in salt water or dirty conditions. Higher frequencies don’t penetrate as well, but because the sound waves are closer together they’re better at separating targets much closer together (like individual fish in a school or a single fish beside a piece of structure). This is why 200kHz looks crisper and is able to separate a big blob echo seen on lower frequencies into multiple targets. This is incredibly useful when targeting predatory fish close around a school of bait.
Beam angle (width) influences how much of the water column and bottom is seen, and how strong the signal is. A wide beam will show many more fish signals because it’s covering more of the bottom and the water above. On the down side the signal is weaker because it’s spread over a larger area, and it can be tricky deciding where the fish are: directly below the kayak or well out to one side? A narrow beam doesn’t cover as much area, but it concentrates the available power making it possible to see much deeper into the water. In addition, since the beam is narrow you know exactly where the fish are.
Here are two very common transducer configurations that combine the factors above:
Shallow water dual frequency transducer – 83kHz at 60° and 200kHz at 20°, often referred to as a “wide beam” transducer. I find the 83kHz frequency useful in shallow fresh water, especially when looking for any structure or weed banks that may be holding fish. It can also be useful in salt water when hunting very shallow areas for rocky gutters or pot holes, but otherwise I don’t find it particularly helpful. The images generated aren’t detailed enough, and the beam width is so wide it can be very difficult to decide where the fish are to properly present baits or lures. In contrast I find the 200kHz frequency of this transducer the single most useful for most inshore salt water kayak fishing. It’s an excellent balance between showing a broad enough area of the bottom when looking for structure and fish, while also providing a detailed image that helps decide where to cast baits and lures. Great for depths out to 100m or more depending on the power output from the sounder.
Deep water dual frequency transducer – 50kHz at 35° and 200kHz at 12°, often referred to as a “narrow beam” transducer. I use the wider angle 50kHz to hunt around new areas looking for structure and to find where there are accumulations of fish. I then use the narrow beam 200kHz to get a detailed look and decide exactly where I want to drop my baits or lures. This beam is very narrow, and with practice it’s possible to target specific fish (this is my ultimate fish hunting tool). These transducers can suffer from noise or clutter at shallow depths (less than 20m), but are capable of finding puka (grouper) and baitfish in depths greater than 600m if the correct sounder is used.
Topics
Latest Posts
Archive Posts
Find Us Also On ...


